BREAKER ADDING NITROGEN
10/01/2025
BREAKER ADDING NITROGEN
Today, I'm going to bring you how to add nitrogen to the breaking hammer. Many people learned only how to use the breaker during their apprenticeship but never saw their masters adding nitrogen. So today, I'll selflessly offer a detailed illustrated tutorial to those friends in need. I hope to bring a bit of experience to everyone. Without further ado, let's directly get to the point. Here, I would like to remind all friends that when installing the breaker on the machine, you need to ask clearly how much nitrogen is suitable for this breaker. Different brands may have different amounts of nitrogen to be added to the breaker. Generally, 13 to 16 units of nitrogen are added to the breaker. Here's another friendly reminder. When the machine is just equipped with the breaker and the temperature of the hydraulic oil is high, the breaker will get stuck when hitting. Finally, it was found that it was because too much nitrogen was added, up to 15. That is to say, when the new breaker is used at the beginning, it's better to add nitrogen to 13, 14, or 14.5. Of course, this varies depending on the breaker.
BREAKER ADDING NITROGEN
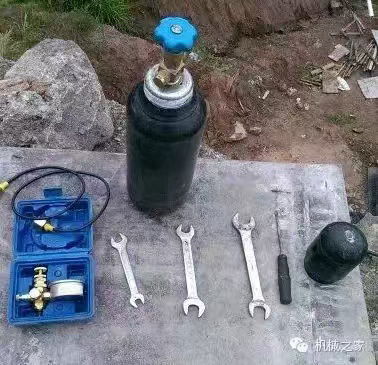
Nitrogen cylinder, nitrogen gauge for nitrogen cylinder, 17-19-24-27 wrenches, and screwdrivers. These are the necessary tools. The tools may vary depending on the breaker. It's better to take a photo of the nitrogen gauge with your mobile phone before taking it out of the box because the position is always incorrect when installing it and it won't be installed properly.

BREAKER ADDING NITROGEN
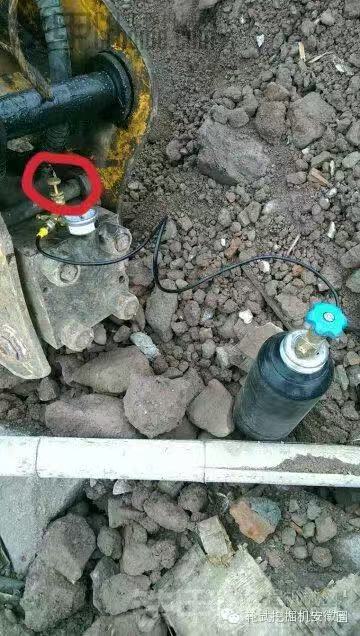
The nitrogen filling port of the breaking hammer is the place marked with a red circle in the picture. First, use a screwdriver to clean the surrounding mud, and then blow gently with your mouth to remove the dust to prevent dirt from getting in when the screws are opened. These are two screws, one above and one below. Sometimes, there is one screw below and a grease fitting is installed above.
BREAKER ADDING NITROGEN
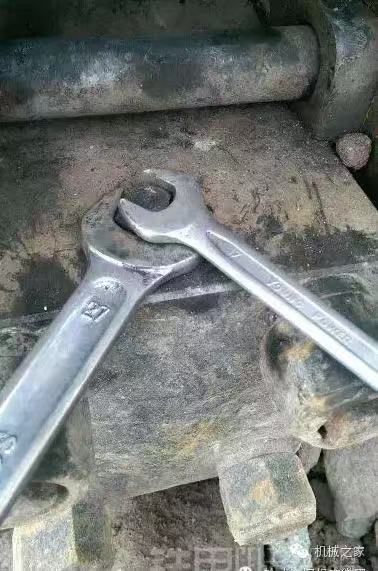
When disassembling the gas filling port, the 27 and 17 wrenches come into play. Rotate gently. Press the lower screw and just rotate the upper one. Don't make a mistake in the direction of the screws when disassembling. If you are not sure, disassemble it gently and tentatively. Here's a friendly reminder: "Don't lose the O-ring inside the upper small screw." The effect picture is as follows ↓
BREAKER ADDING NITROGEN
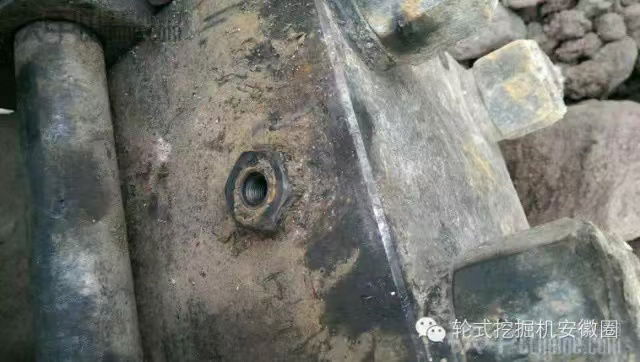
After removing the screw on the hammer body, it looks like this. Next, it's time to install the nitrogen gauge to measure how much nitrogen is inside.

BREAKER ADDING NITROGEN
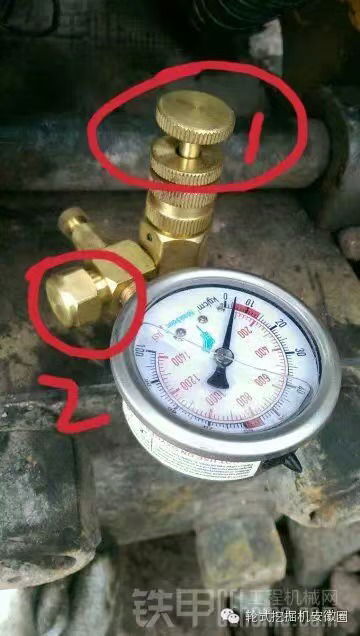
The pressure gauge measures the remaining nitrogen. After installing the nitrogen gauge, it's time to measure the nitrogen. But before measuring the nitrogen, make sure that the screw at circle 2 is installed. If it's not installed, all the nitrogen will be released when you measure it. To measure the nitrogen, just press down at circle 1 to see how much gas is left in the breaker. From the above picture, we can see that there is not much nitrogen inside, just a few. No wonder the breaker is not powerful. After the measurement, lift the needle at circle 1 to prepare for the next step.
BREAKER ADDING NITROGEN
Prepare to add nitrogen. In the above picture, we can see that the needle at circle 1 has been lifted and the nitrogen in the nitrogen gauge has returned to 0. At this time, we open the screw at circle 2 again. Pay attention that there is an O-ring inside. Don't lose it. If it's lost, the nitrogen will leak when adding nitrogen. Next, connect the nitrogen gauge and the nitrogen cylinder with the gas pipe in the middle. The effect picture is as follows ↓
